
Slick back buns are everywhere right now and honestly, I get it. They take about ten minutes, they cover up a bad hair day and they make you look like you’ve got your life together even when you really don’t.
The catch is that every tutorial makes it look easier than it is. You try it at home and your hairline is bumpy, there’s a lot of flyaways around your ears and the whole bun is sliding down the back of your head by lunch.
So here’s how I’d do it, step by step, plus the fixes for everything that usually goes wrong. You don’t need stylist skills. You need a brush, some gel and about ten minutes of patience.
So, let’s go
Which Slick Back Bun Do You Want?
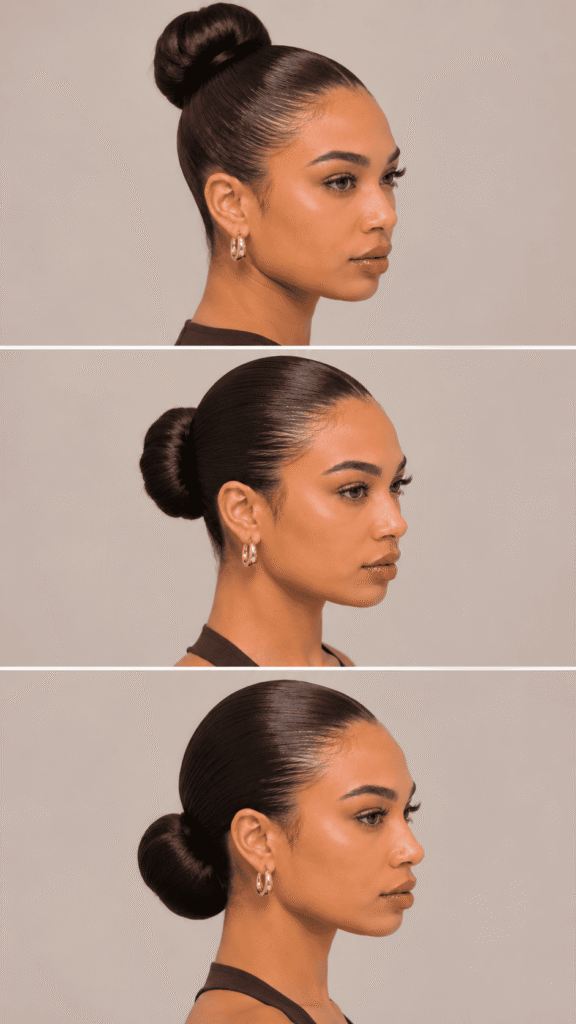
Before you touch your hair, pick the height. It changes the whole vibe.
- High bun: sits at the crown. It’s sharp, lifted, and a little dramatic. This is the one for photos, parties, and anyone who wants a built-in facelift.
- Mid bun: sits halfway between your crown and your nape. It’s balanced and works for pretty much everything.
- Low bun: sits at the nape of your neck. It’s softer, more formal, and the easiest to get right.
If this is your first try, I’d start with the low one. It forgives mistakes way more than a high bun does, and you can work up from there once your hands know what they’re doing.
What You Need
You don’t need a bathroom full of products. Here’s the short list –
Tools
- A paddle brush or boar bristle brush
- A fine-tooth comb
- A snag-free hair elastic, with no metal piece, because metal rips hair out
- Bobby pins close to your hair color
- A spare toothbrush or a clean mascara wand for the baby hairs
- Optional – a bun donut or hair net if you have a lot of hair or want a fuller bun
- Optional – a silk scarf
Products
- A water-based gel or edge control (this is the star of the whole look)
- A strong-hold hairspray
- A light smoothing cream or serum for the lengths
- Optional: a hair wax stick, which is great for sealing flyaways
Prep Your Hair First
This part decides how the whole thing turns out, so don’t skip it.
Day-two hair works better than freshly washed hair. Super clean hair is slippery and the elastic wants to slide right off it. If your hair just got washed, add a little texture first, or give it a few hours.
Detangle everything. Gel on knots just locks the knots in place, and you’ll feel it later.
Decide wet look or matte. Applying gel on slightly damp hair gives you that glossy, wet finish. On dry hair it looks more matte and holds a bit stiffer. Pick whichever one matches the vibe you’re going for.
If you use a blow dryer at any point, spray heat protectant first. Hair that’s brushed back tight and then hit with heat is asking for dryness.
How to Do a Slick Back Bun, Step by Step
Brush everything back.
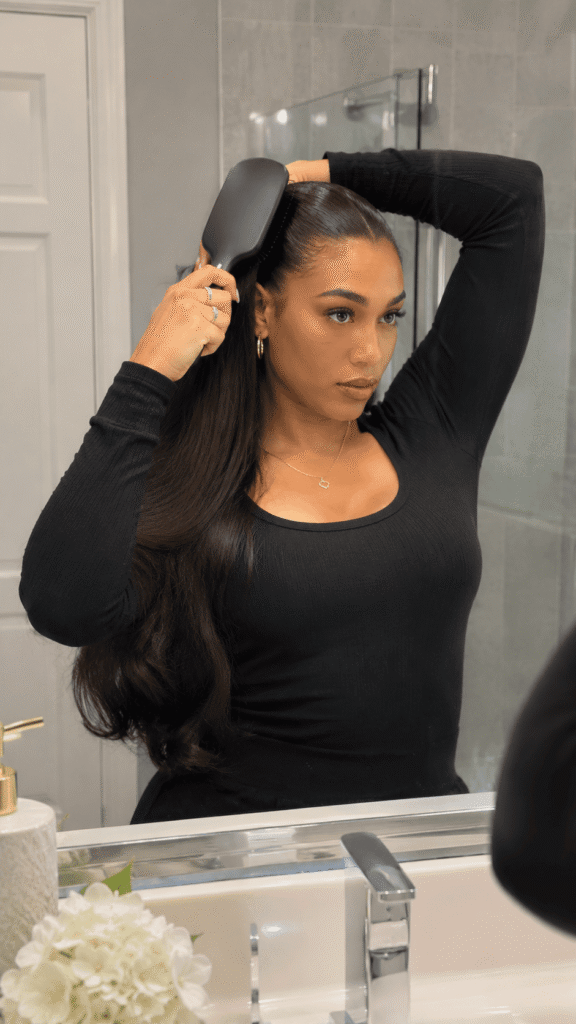
No part, nothing falling forward. Get a clean, even sweep from your hairline to the spot where the bun will sit.
Work the gel in with warm hands.
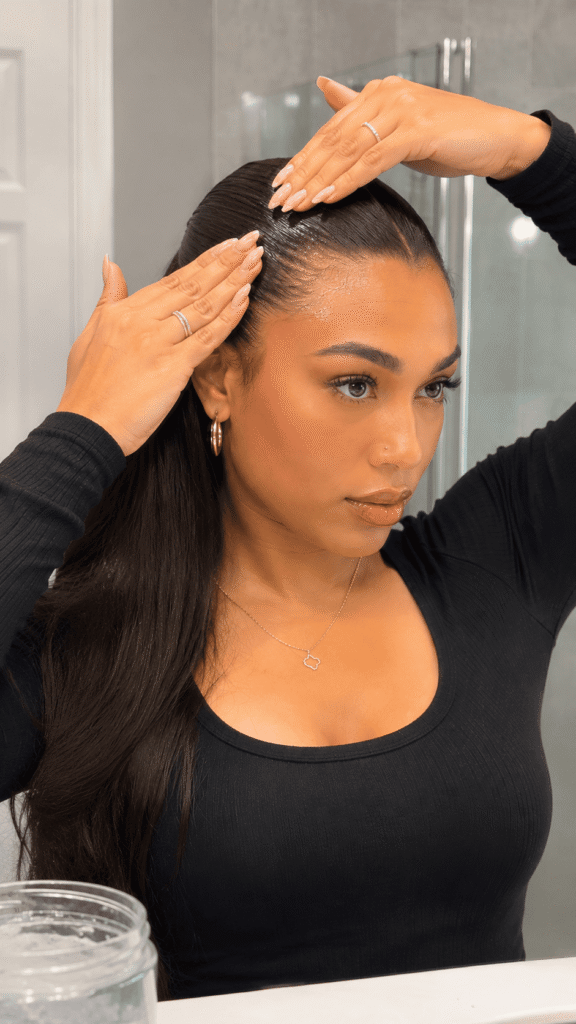
Put a pea-sized amount on your palms and rub them together first. That warms it up and spreads it evenly, so you don’t end up with a white glob stuck at your temple.
Smooth it from your hairline back, then add a bit more in sections instead of a big handful at the start.
Smooth with your brush, not just your hands.
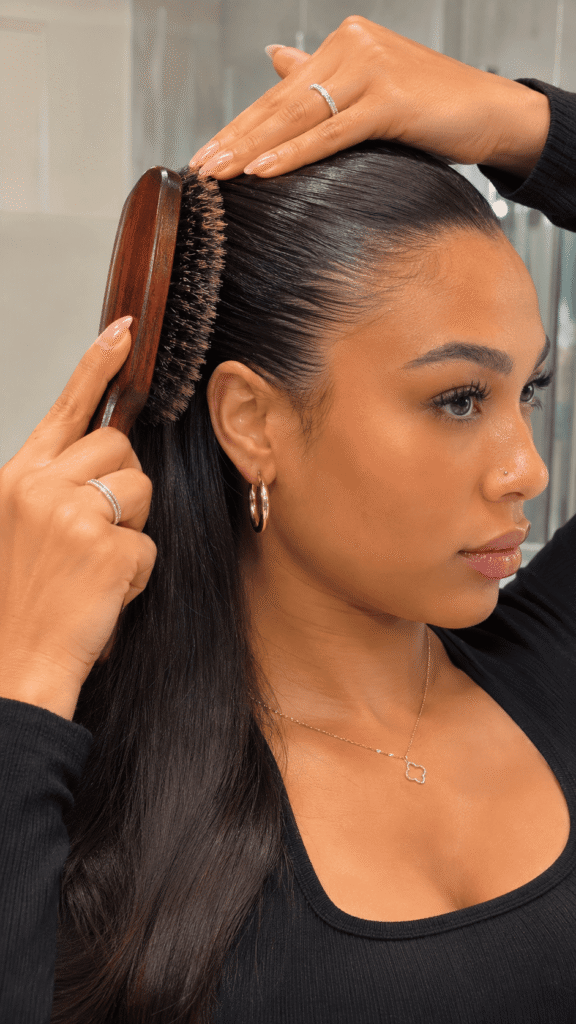
Fingers leave bumps. A brush or comb follows your head shape and pulls the hair flat. Go over the same section a few times until it lies down.
Gather your ponytail at the height you picked.
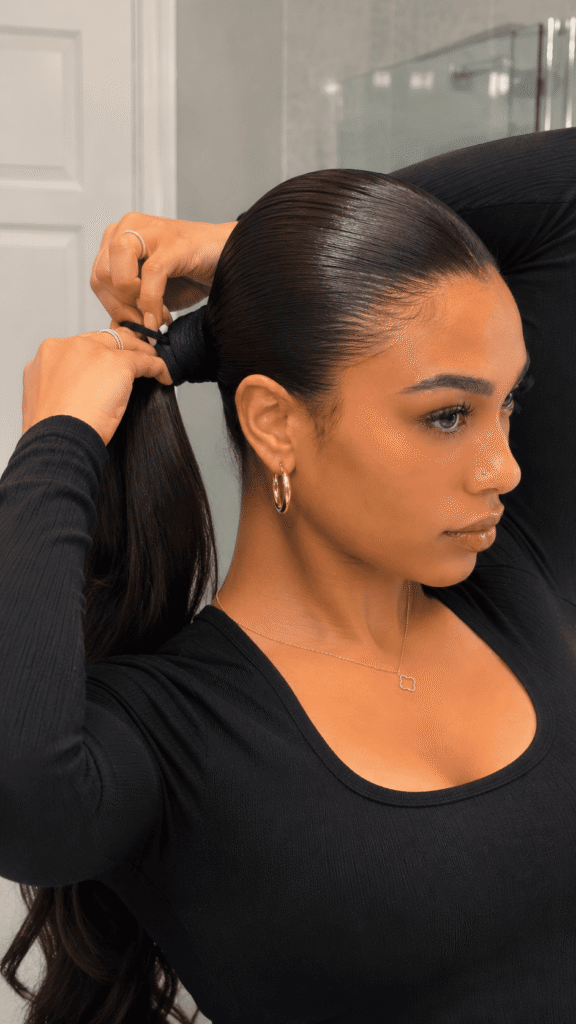
Hold the hair at that spot with one hand and keep the brush pressed against your head with the other, so no bumps sneak in at the back.
Use your elastic, wrap it twice, and make it snug enough to hold, not so tight that your eyebrows lift.
Smooth the ponytail itself. Brush through it, add a little cream or gel along the lengths, and make sure there aren’t any loose strands or kinks hiding in the middle.
Twist and wrap.
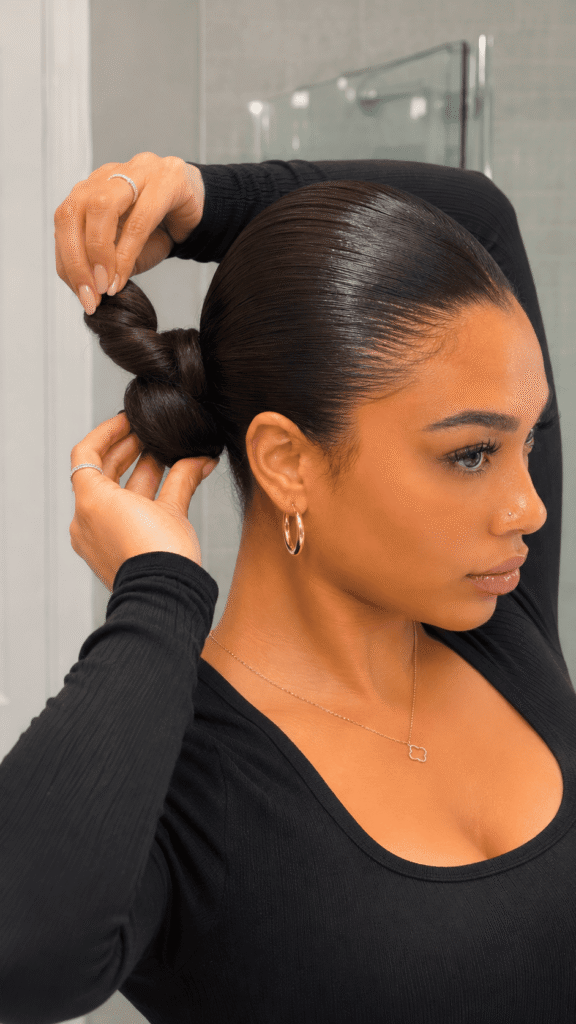
Twist the ponytail so it coils up on itself, then wrap it around the base. If you’re using a bun donut, slide the ponytail through the middle, fan the hair out over it and tuck the ends underneath.
Pin it down.
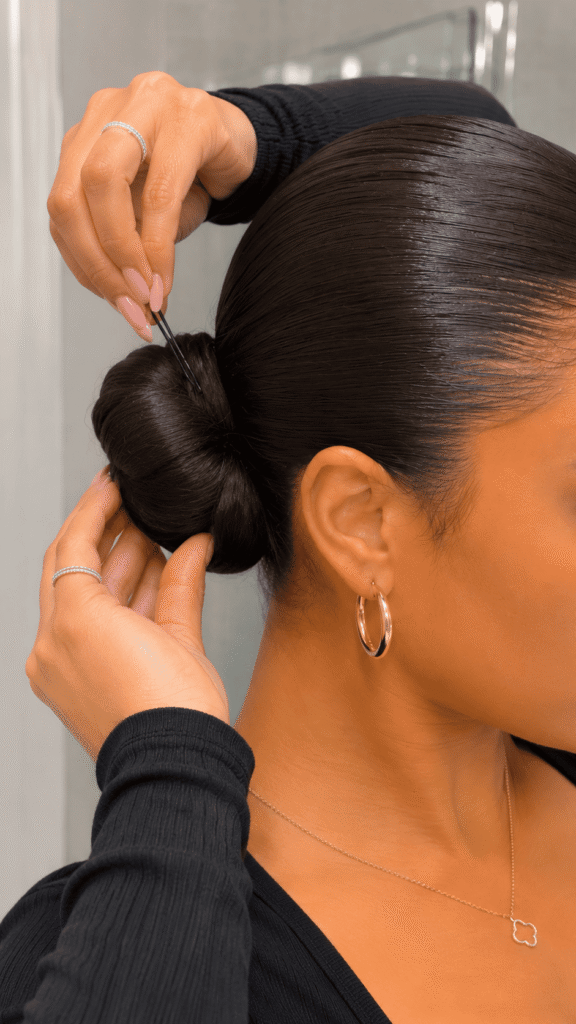
Slide bobby pins in a crisscross shape (an X) around the base. Push the pin toward the bun first, then angle it into the ponytail base, so it grips instead of just sitting on top.
Spray a toothbrush with a little hairspray, or rub a bit of gel on it, and brush the baby hairs and edges flat. Or glide a wax stick over them.
Don’t stress about a few strays, because a tiny bit of life in a slick bun can look better than hair that looks shellacked.
Lock it in.
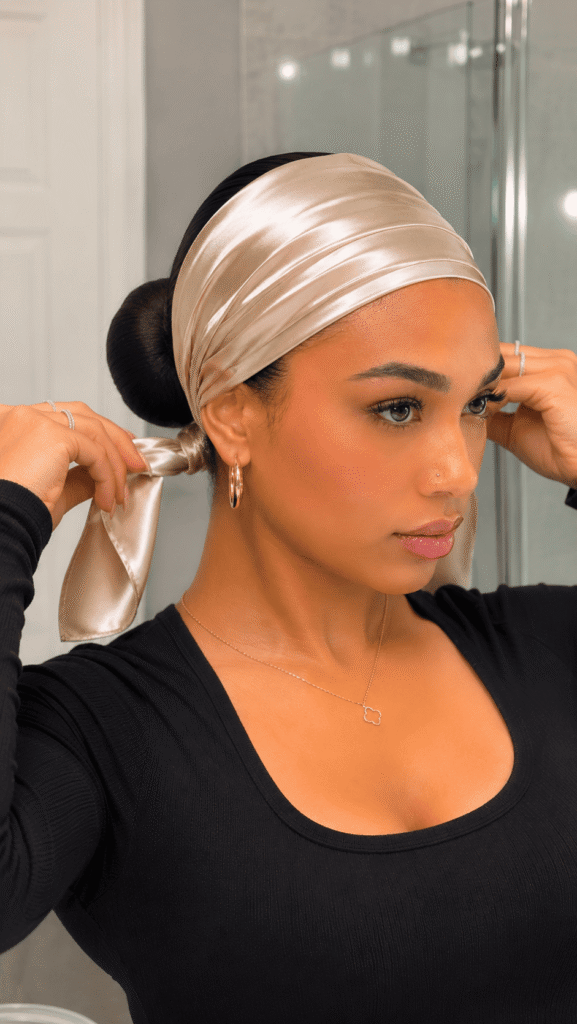
Finish with a good hold hairspray. For extra staying power, tie a silk scarf around your head for ten minutes while you do your makeup or drink your coffee. It sets the shape without squashing it.
That’s the whole thing. If you can brush your hair, you can do this.
Fixing the Stuff That Goes Wrong
Your hairline looks bumpy. You smoothed it with your fingers instead of a comb or brush. Go back over it with a comb while the gel is still wet.
The gel is flaking. This usually means too much product, or too many different products layered on top of each other. Use less, stick to one gel, and don’t spray hairspray on top of a wet, thick coat of it.
The bun keeps sliding down. The ponytail elastic is too loose, or your hair is too slippery. Add a little texturizing spray at the base before you tie it, or loop the elastic a third time.
It looks flat on top. Brush the crown a little less tightly, or use a bun donut so there’s some lift where it counts.
Your head hurts by 3 PM. It’s too tight. A slick bun should feel secure, not like a punishment. Loosen the elastic a bit.
Adjusting for Your Hair Type
Fine or thin hair: Use less gel, because heavy product weighs fine hair down and shows your scalp. A donut or a small hair pad makes the bun look fuller than it really is.
Thick hair: You’ve got more to manage, so split it into two ponytails, one above the other, and wrap them together. Use bigger bobby pins and an extra elastic if one doesn’t hold.
Curly or coily hair: Start with a stretched or smoothed base if you can, like a blow dry or a twist-out. Use a curl cream first, then gel or edge control, and brush when the hair is damp. A bun on curls is naturally fluffier, which is great, but if you want it sleek, give it more time with the brush.
Shorter hair: If you can fit a small ponytail, you can do this. If your hair is too short for that, a clip-in bun gives you the same look.
Final Thoughts
A slick back bun comes down to three things – smooth the hair with a brush, tie it at the height you want and handle the flyaways at the end. Get those right and it looks like you paid for it.
Start with the low version, learn how much gel your hair really needs and work up to the high one when you feel ready. Give it two or three tries before you decide it’s not for you.